Re-Skin Mixamo for Unreal Engine 4 Mannequin
The article explains how to swap a Miaxmo armature with a Mannequin-compatible armature via Chiro (UE4 Mannequin) add-on for Blender.
- Re-Skin Mixamo for Unreal Engine 4 Mannequin
- Intro
- 1. Get the character in T-Pose
- 2. Convert the armature to Mannequin-compatible
- 3. Connect the bones with children
- 4. Snap clavicles to Mannequin position
- 5. Make Twist bones
- 6. Roll the bones
- 7. Fix feet rotation
- 8. Fix finger rotation
- 9. Re-Pose the Mesh to the Mannequin A-Pose
- 10. Export FBX
- Conclusion
Intro
Mixamo characters may have a variety of armatures. Some of them are more compatible with Mannequin than others. The process described in here will not work for every character you find out there, but should work for some of them.
Note
Armatures prefixed with mixamo9: appear to be more compatible and easy to convert.
Warning
- Most likely your character
- has proportions different to the Mannequin
- does not have twist bones and their weight painted vertex groups
- Thus, do not expect
- the character to work without later retargeting in Unreal Engine 4
- the retargeted animation to fit any character perfectly
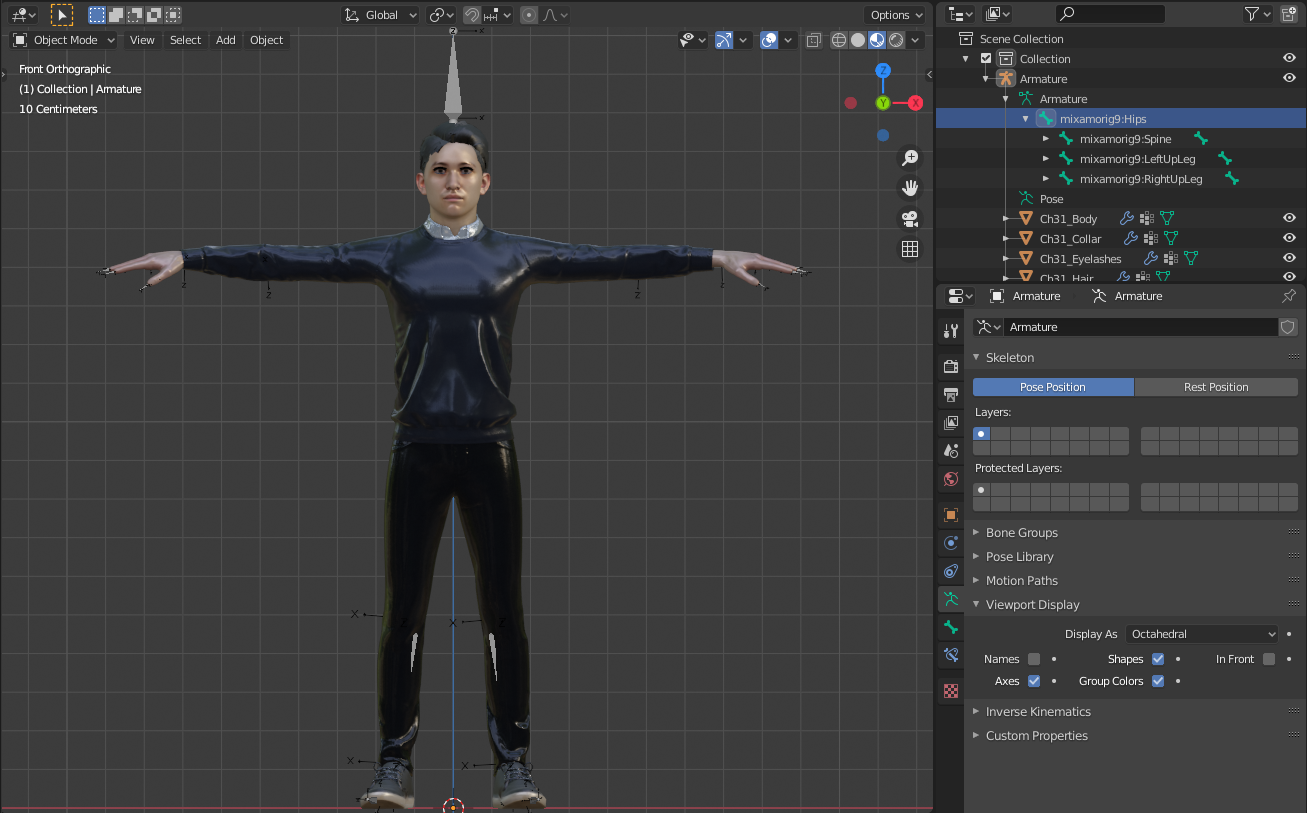
1. Get the character in T-Pose
The easiest way is to download the character in T-Pose. Otherwise, you may have to pose your character manually into the T-Pose before we proceed.
Important
Make sure the character is placed at the origin (in the middle of the scene)
2. Convert the armature to Mannequin-compatible
Now we will rename every bone of the armature into its Mannequin counterpart and also delete the redundant leaf bones.
To do that, we will use Skeleton conversion transformation.
- Select the Armature
- Go to
Edit mode - Find and press in the menu
Armature -> Chiro (UE4) -> Mixamo --> Skeleton conversion
3. Connect the bones with children
Some characters may have incorrect bone orientation. The easiest way to make sure all bones are positioned correctly (or at least similar to the Mannequin), is to connect the bone tails to children.
To do that we will use Connect the bones with children transformation.
Find and press in the menu:
Armature -> Chiro (UE4) -> Mannequin --> Connect the bones with children
4. Snap clavicles to Mannequin position
Most likely your character T-Pose will have clavicle root positions aligned with the spine bone by the X axis. The Mannequin, however, has its clavicle roots displaced forward, which better replicates human anatomy. Later, when retargeting the Mannequin animation in Unreal Engine 4 for our character, this will make an effect of the shoulders stretched back too far, which looks like if scapulae are brought together. To reduce that effect, we can move the clavicle bone roots forward, similar to the original Mannequin armature.
To do that we will use Snap clavicles to Mannequin position transformation.
Find and press in the menu:
Armature -> Chiro (UE4) -> Mannequin --> Snap clavicles to Mannequin position
5. Make Twist bones
Most likely the character does not have the Mannequin Twist bones. Even though there are no Vertex groups nor Weight paints, we still need those Twist bones to exist so that Unreal Engine 4 can work with the skeleton when we retarget Mannequin animation. This is important for the engine that all the bones exist and precisely reproduce the original skeleton hierarchy.
To do that we will use Make twist bones transformation.
Warning
This transformation generates the bones only. It does not generate any Vertex Groups with Weights. If you want your character to be more compatible with retargeted animation, you may need to manually Weight paint those Vertex Groups.
Armature -> Chiro (UE4) -> Mannequin --> Make Twist bones
6. Roll the bones
The Mixamo characters have the bone heads and tails properly placed out of the box, same as the Weights for the Vertex Groups. However, an important difference with the Mannequin is the bones are rolled differently. Fret not, you don't have to re-roll every bone manually as long as your character is carefully posed in T-Pose. As long as it is the case, the add-on can detect proper rolls for every bone. Then you may correct the small bits manually if you'd like. Although, usually it will have "good enough" result without manual changes.
Warning
It is important that the Mesh is in correct T-Pose:
- Face: looking straight forward, head is aligned by Z axis
- Feet: looking straight forward, parallel to the floor
- Arms: aligned by X axis, parallel to the floor
- Upper arms: parallel to the floor
- Elbows: looking straight back (towards Y axis)
- Palms: parallel to the floor
Note
Usually Mixamo in T-Pose will have the correct posture out of the box.
After we make sure the mesh is in the correct T-Pose, we may reroll the bones.
To do that we will use Bone Roll T-Pose transformation.
Armature -> Chiro (UE4) -> Mannequin --> Bone Roll T-Pose
7. Fix feet rotation
The Bone Roll T-Pose transformation will try to detect the best possible rotation. However, depending on the actual mesh pose, it will not be correct for some bones. Particularly, if the feet of the mesh don't look straight forward, then the roll will not be correct.
Not a big problem. We can fix the rolls manually. To do that:
- turn on X-Mirror
- fix the left foot roll so X axis looks down
Warning
Right foot bone X-axis should look straight up, but with X-mirror that will be auto-corrected
8. Fix finger rotation
Same as with feet, finger rolls may need manual update so every X axis of every finger bone (except thumb) looks straight down, following the palm direction.
- turn on X-Mirror
- fix the left arm fingers so that X axes look down
Warning
The palm should be looking down as well. This is X-axis of the hand_l bone
9. Re-Pose the Mesh to the Mannequin A-Pose
Before we can export the character to FBX, we have to re-pose it into Mannequin A-Pose. This is necessary so that add-on may transform the bone rotations later when exporting to FBX. We will omit the technical details here, but this is necessary for the character to get exported correctly.
To do that
- Go to
Pose mode - Find and press in menu
Pose -> Re-Pose (Chiro UE4) -> "Mannequin --> A-Pose" - Find and press in menu
Pose -> Apply -> Apply Pose to Mesh & as Rest (Chiro)
10. Export FBX
Now it is ready for exporting to FBX. However, the add-on has its own Export FBX operator, that uses correct export settings and takes care about some extra stuff that you usually don't want to do manually. For the details on the Export FBX operator, see its own documentation section.
Note
Export FBX operator saves files into the same folder where your current .blend file resides
File -> Export -> FBX (Chiro UE4 Mannequin) -> Save as ***.fbx
Conclusion
The resulting FBX file is ready for Unreal Engine 4 with default import settings.
Although, most likely your character will need animation retargeting in Unreal Engine 4.
If you are not sure how to do that, see HowTo: UE4 Retargeting.
Here is the result of what we have done in this article, with animation retargeting as per HowTo: UE4 Retargeting.